
Submitting to the App Store is a pretty hefty task. While submitting Gyra, I sort of documented as much of the process as I could. This is not by any means comprehensive, as I omit a lot of details about iTunes Connect. However, I hope that this will still be sort of a helpful guide in submitting Unity games to the App Store.
This guide presumes that you already exported your game to iOS from Unity’s Build Settings. This creates an Xcode project you may have to tinker with later. You must also be subscribed to the Apple Developer Program (which is $99 a year for individuals).
Make A Distribution Certificate
Certificates are used by Apple to sign your app, thus identifying you as the developer. Certificates are tied to a computer and there are multiple kinds (like for development and for distribution). The following procedure is for getting a certificate to submit to the App Store:
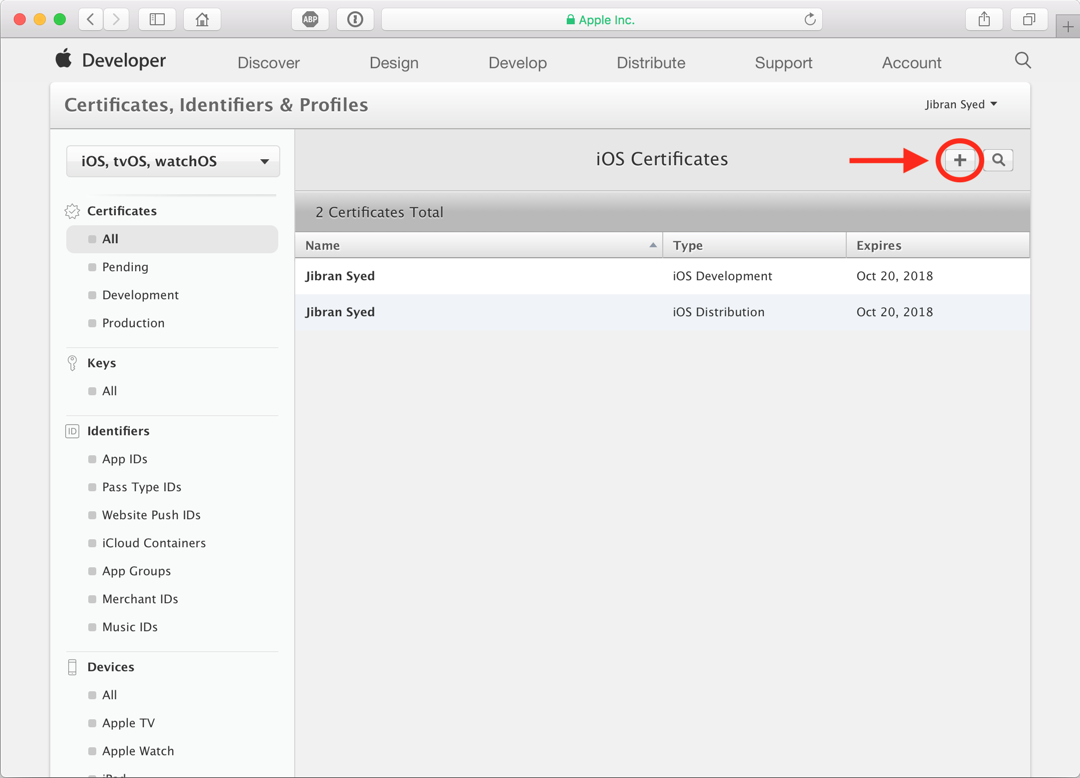
- Login to your Apple Developer account and go to Certificates, Identifiers & Profiles.
- Press the button on the top right corner.
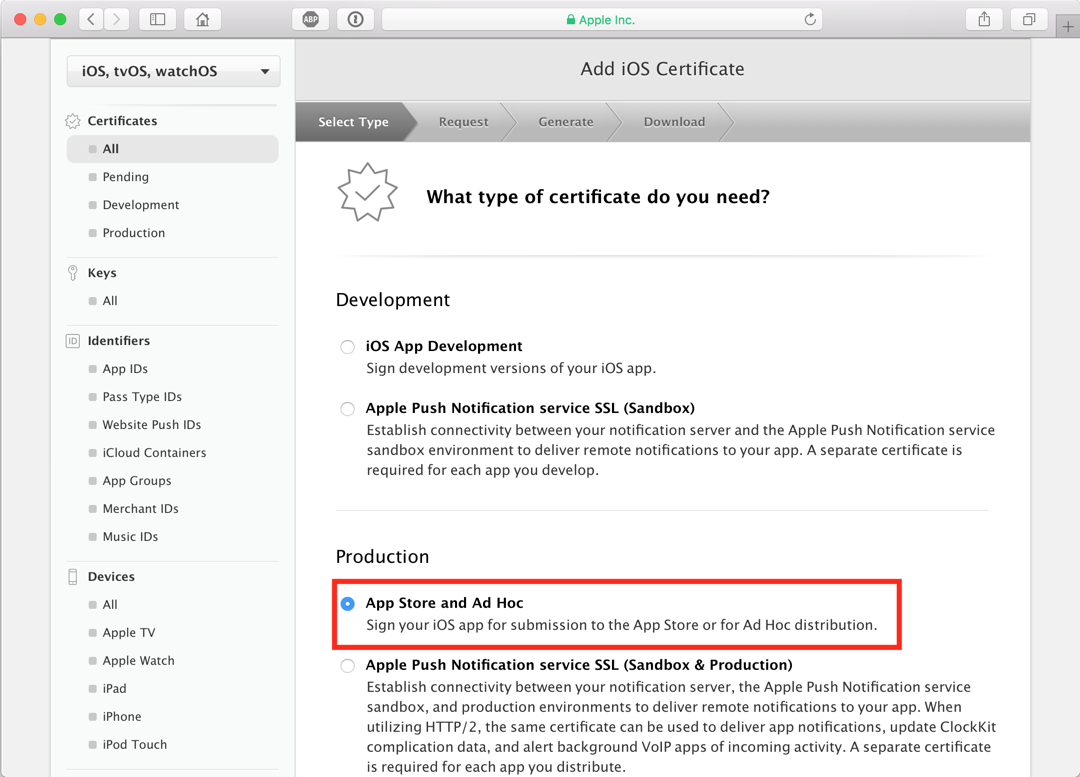
- There are many types of certificates. For a distribution certificate, select App Store and Ad Hoc and press Continue.
- It will tell you to create a Certificate Signing Request. You will eventually send this CSR file to Apple, which in effect is like asking Apple for permission to distribute your app. The certificate itself is the granted permission to distribute. Click continue.
- Open the Keychain Access app on your Mac (remember that a certificate is tied to a Mac, so you can only distribute from the Mac with an installed distribution certificate).
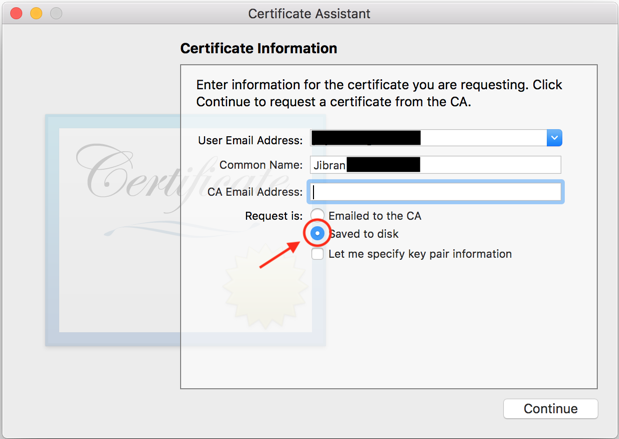
- Go to the menu Keychain Access ▶ Certificate Assistant ▶ Request a Certificate From a Certificate Authority…
- Provide your email in User Email Address, and your name in Common Name. Do not fill out CA Email Address.
- Select Save to disk and click Continue
- Save the file
CertificateSigningRequest.certSigningRequestin a convenient directory (like theDesktopfolder, for example). - Back on the Apple Developer site, you should see the field Upload CSR File. Drag and drop your
.certSigningRequestfile onto the button that says Choose File, then click Continue. - Your certificate should be ready. Download it and double click on it. Xcode should open, and the certificate should be installed (it won’t give you any confirmation of that, unfortunately).
Make App ID
An App ID is a unique identifier for each app on the App Store. Typically, this ID is based off your app’s Bundle Identifier (that can be found in your Xcode project’s settings).
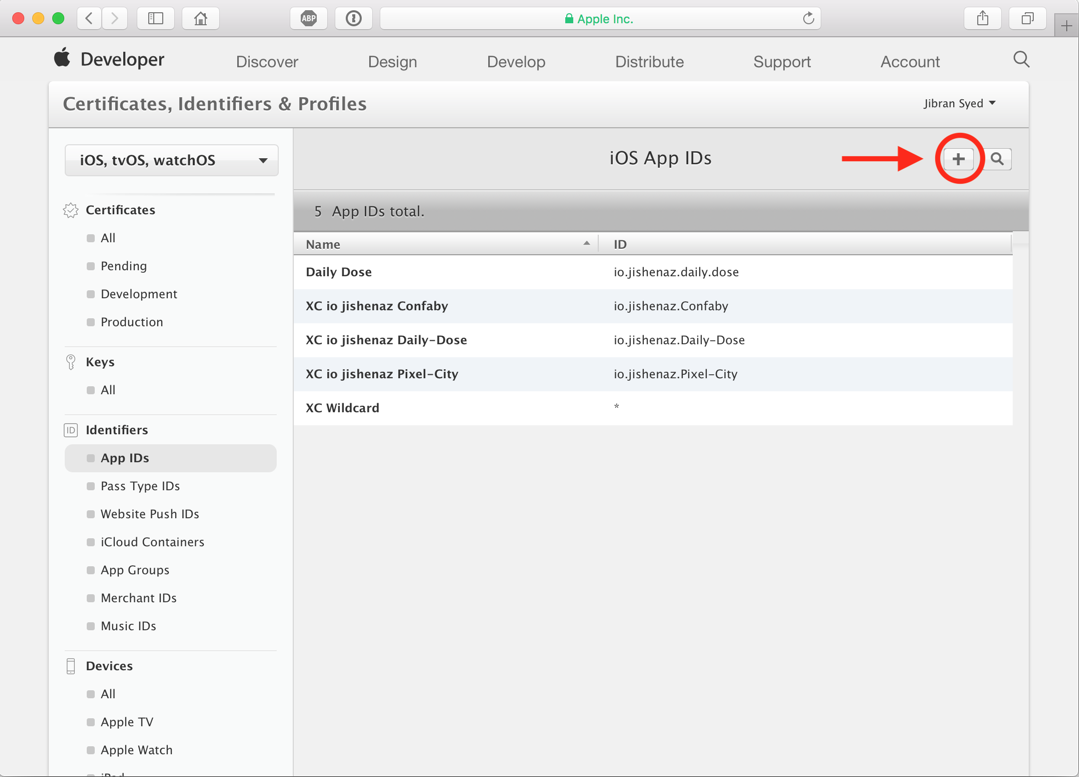
- To make an App ID, go back to the Certificates, Identifiers & Profiles section of the Apple Developer site, and click on App IDs on the left side.
- Press the button in the top right corner.
- Enter name for your App ID. This is typically the name of your app.
- Select Explicit App ID, and provide a Bundle ID (it must be the Bundle Identifier of your app in the Xcode project’s settings). Click Continue.
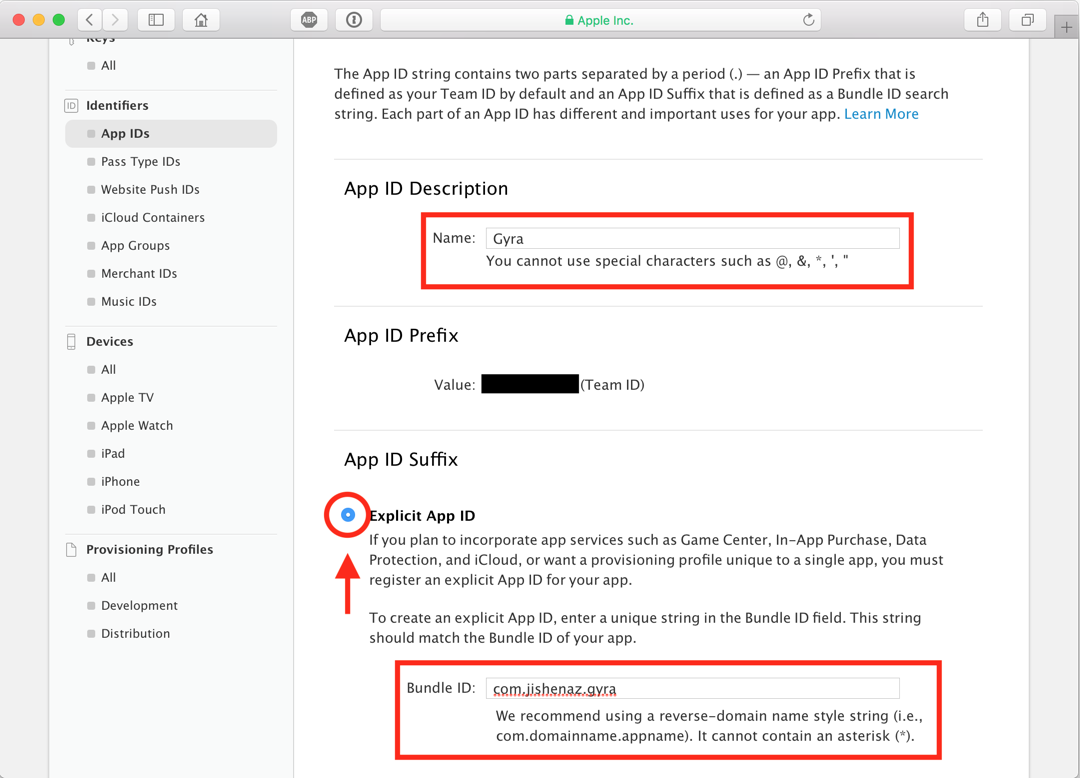
- Click Register, and then click Done.
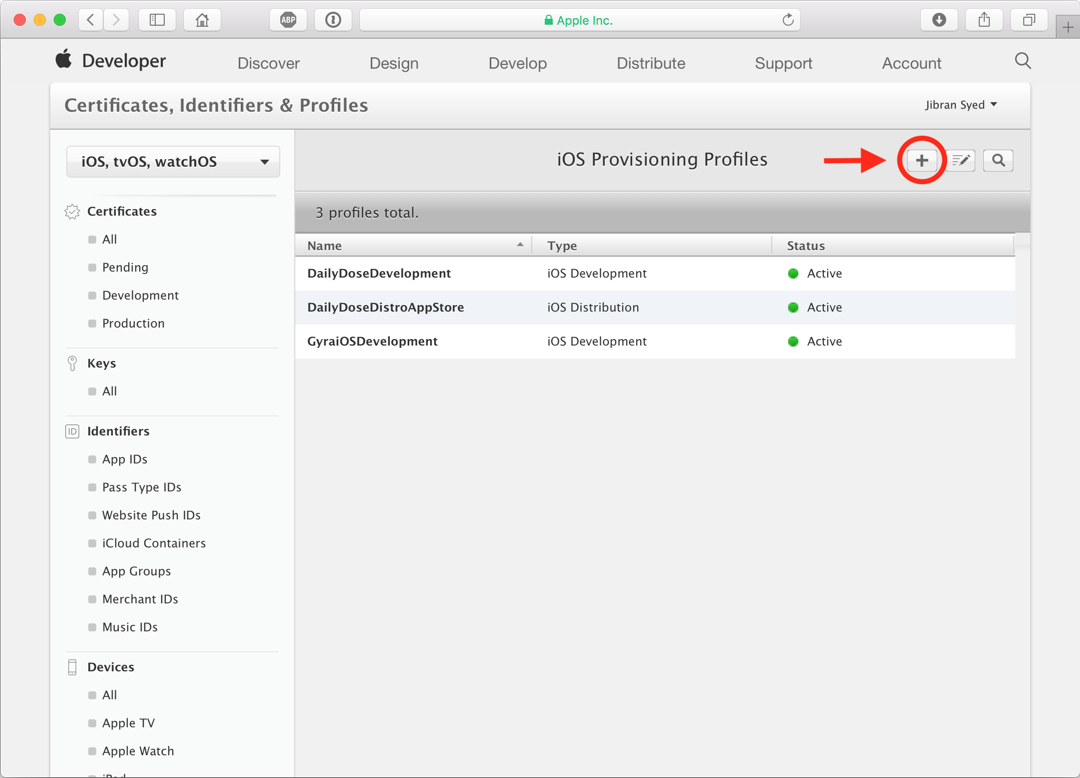
Distribution Provisioning Profile
A Provisioning Profile is kind of like a “package” that ties your certificate (your computer) to your app, and your testing devices (for development or ad hoc profiles). Provisioning profiles can authorize running an app on a test device (development) or for submitting it on the App Store (distribution). The following instructions are for making a Provisioning Profile suitable for submitting to the App Store:
- Back to the Certificates, Identifiers & Profiles section of the Apple Developer site, and click on Provisioning Profiles on the left side.
- Press the button.
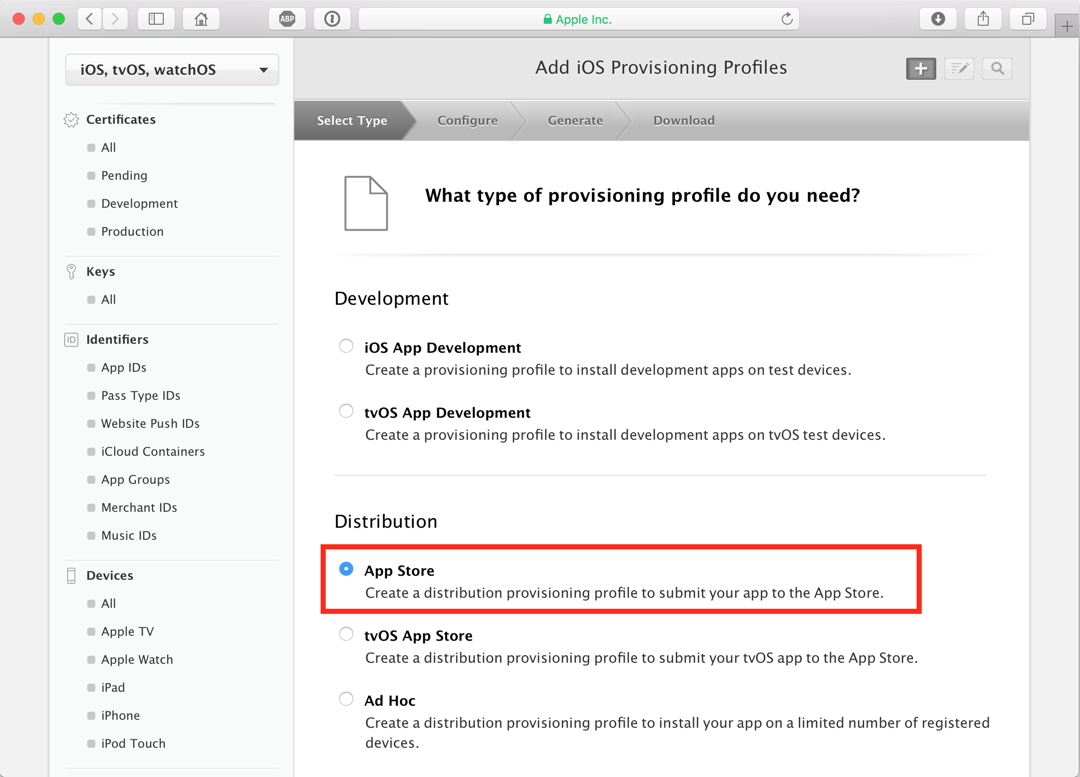
- Select App Store and click Continue.
- Select the App ID you just made from the drop down menu, and click Continue.

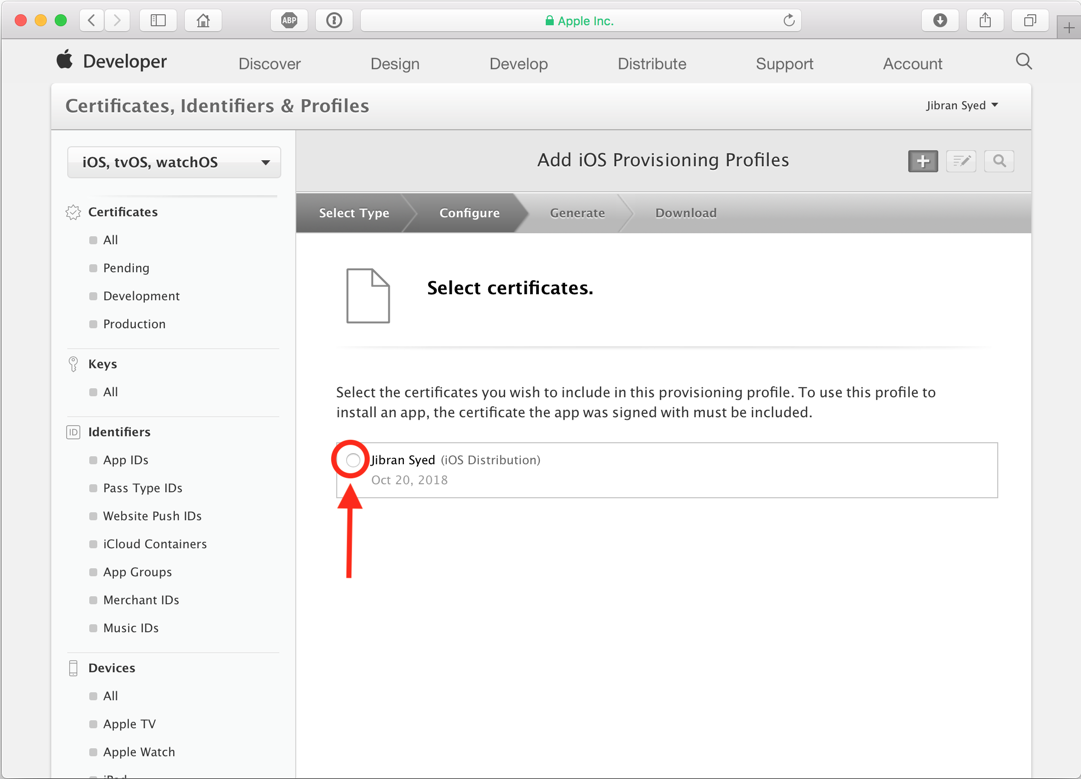
- Select your distribution certificate and click Continue.
- Now name your Provisioning Profile. Choose something very specific. I personally chose
GyraiOSDistributionAppStore. Click Continue.
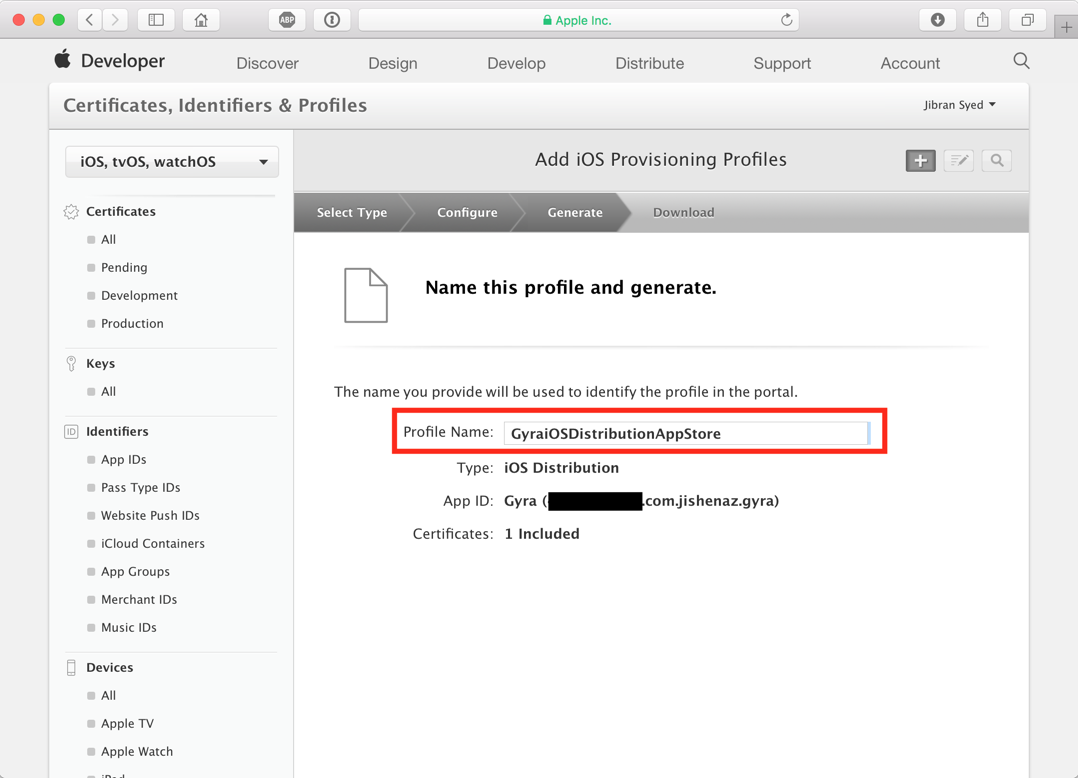
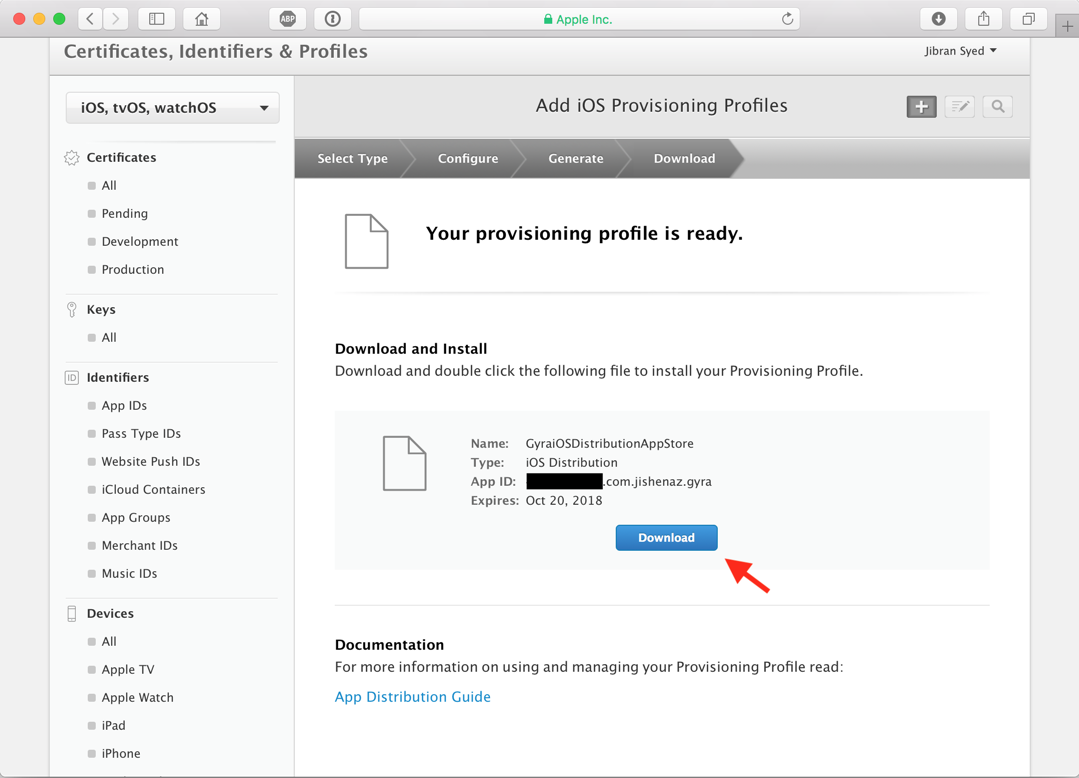
- Download the Provisioning Profile and double click it. It should install, but you will not get confirmation for that.
You may have to repeat these same steps for a Developer Provisioning Profile (which allows testing locally in your device). You would select iOS App Developer instead of App Store when choosing the type of profile. You may also have to provide mobile device UDIDs to allow testing (Xcode might take care of this for you, if you plug in your device to your Mac while Xcode is open).
Setting up the Xcode project with the Provisioning Profile
- Back in Xcode, go to project settings. Make sure that you select the app target
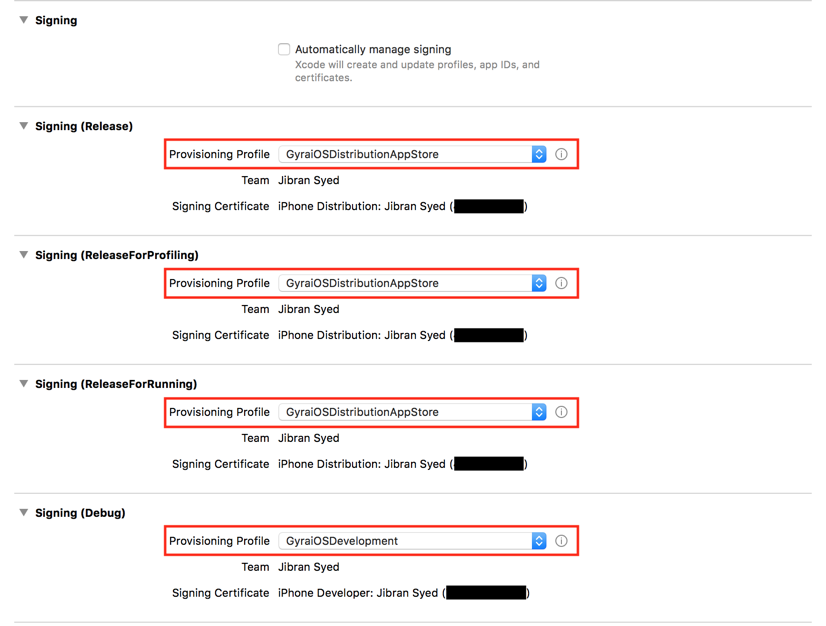
- Uncheck Automatically manage signing

- For all Release Signing sections, provide the Distribution Provisioning Profile.
- For Development Signing section, provide a Developer Provisioning Profile. (Note that if this doesn’t work, change it to the Distribution Profile instead.)
- Now go to the Product menu and select Archive. It should build a package that is ready for submission to the App Store.
- If archiving fails, try changing the Signing (Development) section to use the Distribution Provisioning Profile.
When it’s done, it will load a window called the Organizer where you can validate and upload your app. But first, Apple needs to have a record for this app on iTunes Connect before you can upload it to the App Store.
New app on iTunes Connect
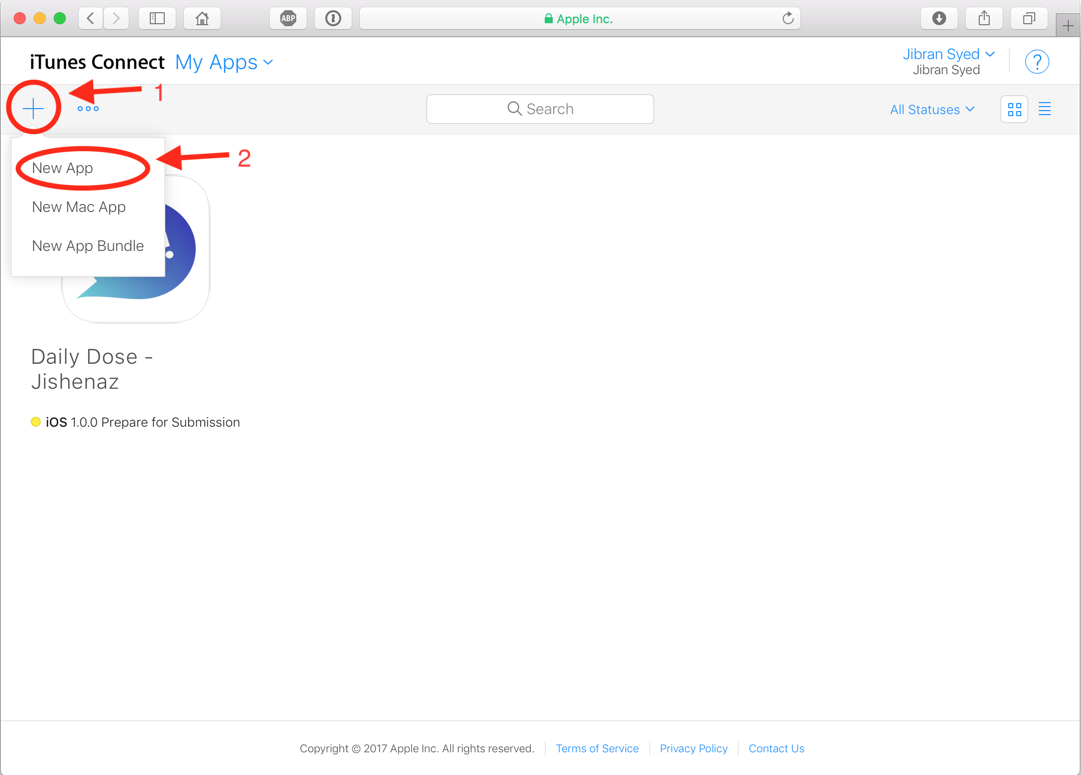
- Login to iTunes Connect (you must be a paying developer), and go to My Apps.
- Click on the button and select New App.
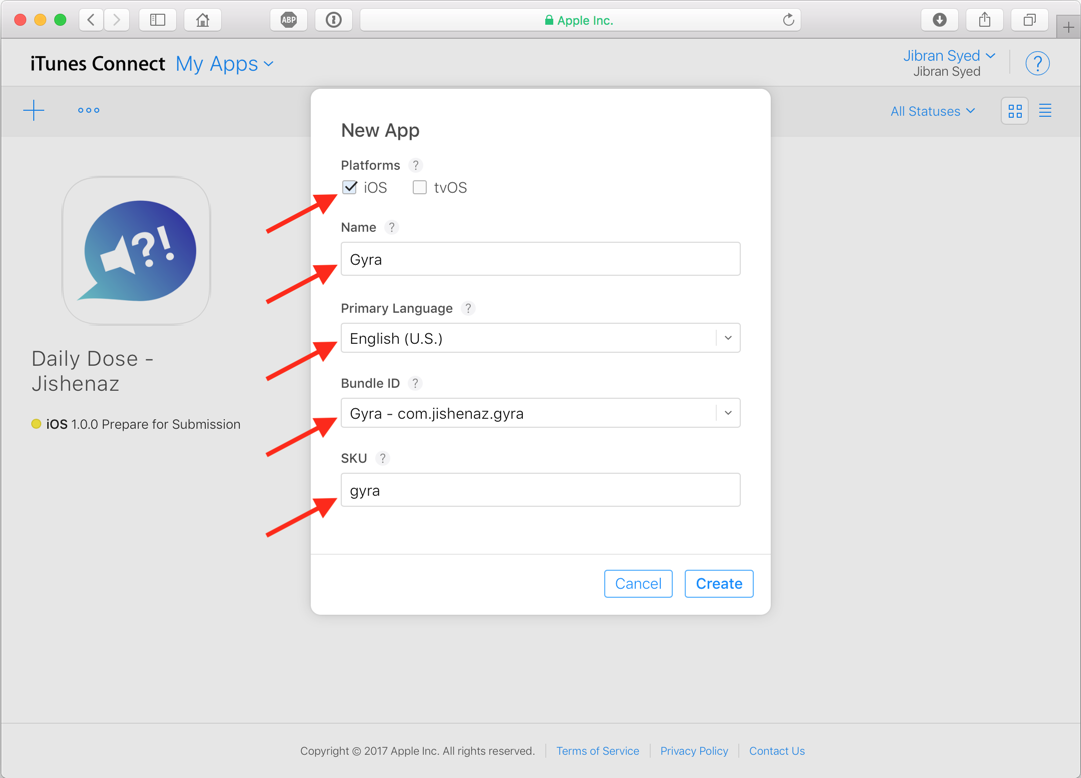
- Fill out the form provided. Check iOS. The Bundle ID is the App ID we created. The SKU is a unique ID; try giving it a relevant name. It may possible be taken though, so come up with something very unique.
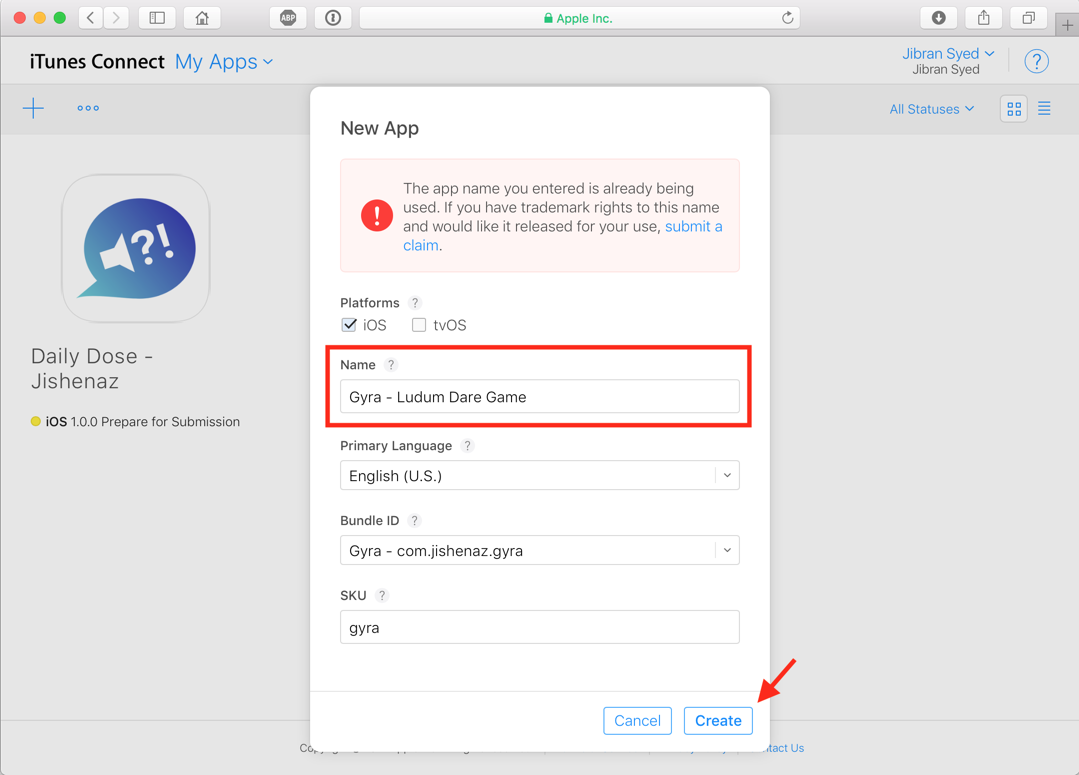
In my case, it was the app name that was taken. This is the name that shows up on the App Store. It also must be unique like the SKU. I changed mine to add a little more detail. Press Create when you are done.
Submitting Build to iTunes Connect
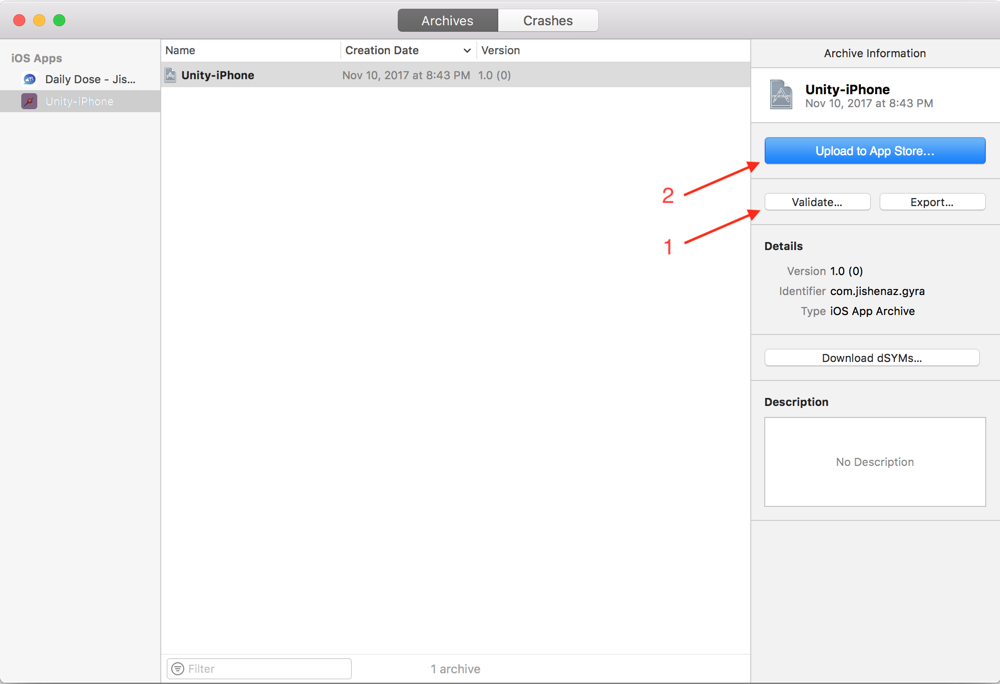
- Go back to the Organizer in Xcode.
- Go to your app archive and validate it first.
- It will ask for your Distribution Provisioning Profile before continuing.
- If validation fails, resolve any issues mentioned and try again.
- Once validation succeeds, click Upload to App Store…
Note that Apple does some processing on your uploaded build before you can choose it on iTunes Connect. You may have to wait for an hour or more.
Prepare App Submission
Apple will send you an email when they have finished processing your uploaded app.
- Once that happens, go to iTunes Connect ▶ My Apps.
- On the App Store tab, fill out all of the required information needed for app submission. There is too much of that to cover here, but it should be easy to figure out.
- You will need at least 2 screenshot: one for a 5.5” iPhone and the other for a 12.9” iPad. You typically get screenshots by running the app on an iOS Simulator and pressing
Command + S. - App Previews are basically video previews of your app that autoplay in the App Store. Apple has a good reference about making App Previews here. However, I must warn that you need a 5.5” iPhone (any “Plus” sized iPhone) and a large iPad (9.7”+ suffices) in order to have the necessary App Previews needed for the App Store. Fortunately, App Previews themselves are not required when submitting an app.
- On the Prepare for Submission page, scroll down to the Build section and you should be able to select the build you recently uploaded. If you want to make newer builds later, don’t forget to increment the build number and version number in the Xcode project’s settings.
- After you have filled out everything, click Submit for Review towards the top of the submission page. Apple will soon review the app for approval.
If Apple emails you saying they they approve of your app, it may still take about a day for it to actually show up on the App Store.